
In this tutorial we look at Strongpoints. Load up the new version of the editor, and then load up our Luxembourg scenario - refer to Editor Tutorial 2 if you need reminding how to do this.
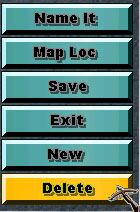
From the Main Menu, select Edit Strongpoints, this should take you to the familiar lay out of the Strong point Menu. Listed in the right panel are the strongpoints that already exist in the scenario. Clicking on any of these will take you to that strongpoints location on the map. Alternatively, clicking on a Strong point on the map will highlight the corresponding Strong point in the right hand panel.
The bottom panel displays the Strong point Menu, from where we can restrict strong points by toggling either Show Axis Only or Show Allied Only.
The first thing that we want to do is remove all of the existing strongpoints. So click on Edit Strong Points to bring up the Edit Strong Point Function, and then one by one click on the Delete Button.
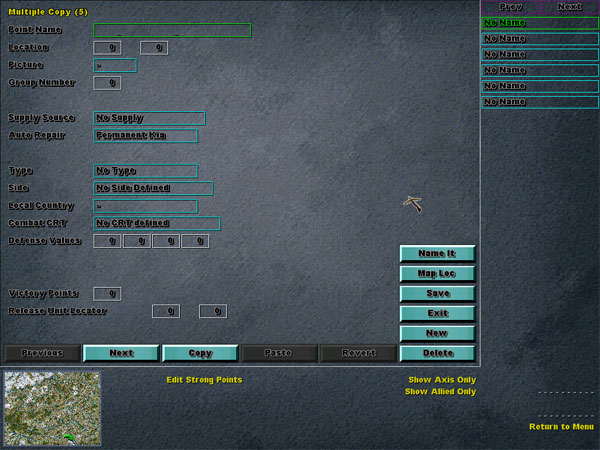
Continue deleting the Strongpoints until you have removed them all. Note that when you get to the end, the last one may continue to appear in the list on the right hand panel, and that the SAVE button will gray out - not allowing you to save. That's ok. At this point, click on New a few times to add some 'blank' strongpoints back into the scenario. Note that these new strongpoints will not appear in the scenario until we enter map coordinates and data for each of them. After you have added 5 or 6 new strongpoints, the SAVE button should become active - click on it to save the data.
Your screen should look like this one below - with half a dozen new strongpoints in the right hand panel - but no data entered for them.
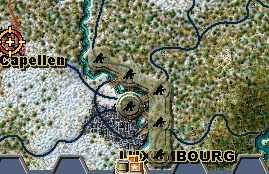
Now we will re-allocate a few of these new strongpoints back into our scenario and make them active. With the first Strong point select, click on the Map Loc button and then select hex 45,47 - which should be in Luxembourg itself.
Before we can assigned a assign a picture for the Strong point, we need to define and save the side/country data. So select Allied as the Side, and United States for Local Country and then click on the Save Button to save it.
Now click in the Picture data entry field, and you should be presented with a list of images to choose from. Remember that you will not be able to see these images until you have saved the country and side data - this is because the editor needs to know which image files to call up - they vary depending upon which side the Strong point belongs to.
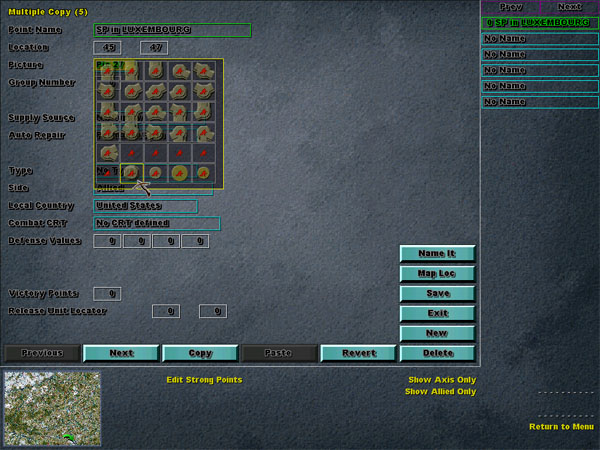
For this Strong point, select Picture 27, which is the second one along on the bottom row.
Change the Type setting to Fixed Defense, and the Combat CRT to Fortifications. Finally, lets give this Strong point 1 defense step value of 5, so enter "5" into the first box next to Defense Values. Now click on Save.
Well done! We have just created our first Strong point The next ones are going to be a bit easier, because we will use this one as a template to copy and paste over into the other new ones. So with the strong point that you just created selected in the right hand panel, click on the Copy Button. Select one of the new "No Name" strongpoints in the right hand panel - or click on the New Button, and then click on Paste.
You should now have pasted the data from the first Strong point that we created in the town of Luxembourg, into our new Strong point All we need to do now is update a few of the variables. Click on Map Loc to set the new location of this Strong point, and select hex 49,41 - the town of Consdorf. Now click on the Set Name button to update its name. Click on Save. We have just created our second Strong point
Follow the same steps that we just completed, to create strong points in the following hexes: 44, 35 (Diekirch), 40,35 (Ettelbruck), 42,40 (Mersch) and 39,33 (Wiltz).
Now we will do something slightly different. In the hexes to the east of Luxembourg, lets create a wall of strongpoints - and lets make it look like a wall! Using one of our existing strongpoints as a template, select one of them and then click on the Copy Button.
Now click on the New Button and then select the new 'no name' strong point in the right hand panel and finally click on the Paste Button to paste the copied data into it - in the same way that we did above. Click on Map Loc to set the location of the Strong point, and select hex 44,45, click on Name It and then finally click on Save. For this Strong point though we want to change the picture of it, so click in the Picture box and select Pic 4 (the 4th one across on the first line). Click on Save to save the data.
Now lets make the next one, click on the New Button, select the new 'no name' Strong point and Paste the data into it. Check the Map Loc of this one to hex 45, 46 and the picture to Pic 5 (last one on Row 1) - click on Name It and then Save. You can probably see what I am doing now.
Moving onto the next one, click on the New Button, select the new 'no name' Strong point and Paste the data into it. Check the Map Loc of this one to hex 46, 46 and the picture to Pic 14 (4th one on Row 3) - click on Name It and then Save. Go ahead and finish off the 'wall' of strongpoints in front of Luxembourg with the following hexes and pictures: 46,47 (Pic 2) and 46,48 (Pic 3).
Feel free to add any other Strongpoints as you see fit. It may be worthwhile throwing one or two in for the Germans - maybe at Welshbillig.
You do not need to read this part of the tutorial unless you want to learn more about Strong Points, as we look at each of their variables in more detail.
Point Name : This is the name of the Strong point, usually a name is assigned automatically to the Strong point by click on the Name It button after you have set the location of the point on the map.
Location : These are the hex coordinates of the Strong point Clicking on the Map Loc button will take you to the map window where you can use your mouse to select the hex that you want the point to occupy.
Picture : Here you can select an image to represent the Strong point on the map. Note that you must first define and save the Side data for the Strong point before you can gain access to the picture files. This is because different image files are used for each of the Allies and Axis sides.
Group Number : This field is not required.
Supply Source : Allows you to define the Strong point as a source of supply for units stacked in the same hex as the strongpoint.
Auto Repair : Allows you to define how many turns it takes for the Strong point to automatically repair itself. Valid settings are Permanently KIA through to 9 Turn Delay.
Type : Allows you to defined the Strong point as either a Fort or a Fixed Defense. There difference between these does not have any effect on game play.
Side : Defines which side the Strong point belongs to (Axis or Allies). This determines which image file to use in the Picture setting and also determines which side owns the Strong point
Local Country : Allows you to define which local country the Strong point belongs to. This setting can be left blank.
Combat CRT : Allows you to define what CRT (Combat Results Table) will be used to resolve combat against the Strong point
Defense Values : Each Strong point can have up to 4 defense steps. Enter the value for each of the steps (ie: Entering 5 and 8 means that the Strong point will have an initial defense value of 8 with 2 steps, and will drop to 5 when it has one step left).
Victory Points : Allows you to allocate victory points for the destruction of the Strong point
Release Unit Indicator : Strongpoints can be assigned as 'fortifications' that have been dropped down by units. Whilst the strongpoints have been 'dispersed' the owning unit can not move or operate as a normal unit. You may have seen some of these units on the Allied side in the Ardennes Offensive. The unit that 'owns' the Strong point(s) can 'call them up' at any point within the game. When they do this, the strongpoints disappear and the unit is able to move, attack and operate as a 'normal' unit. If you want to allocate the Strong point as a 'dispersed fort' then you should enter the hex coordinates of the 'owning or mother unit' here.